# Example: Add Rows to Google Sheets
Here, you'll find examples of how to add your data to Google Sheets. Each example has a workflow you can copy, with sample Node.js code.
# End-to-end example with sample data
The examples below use this spreadsheet (opens new window).
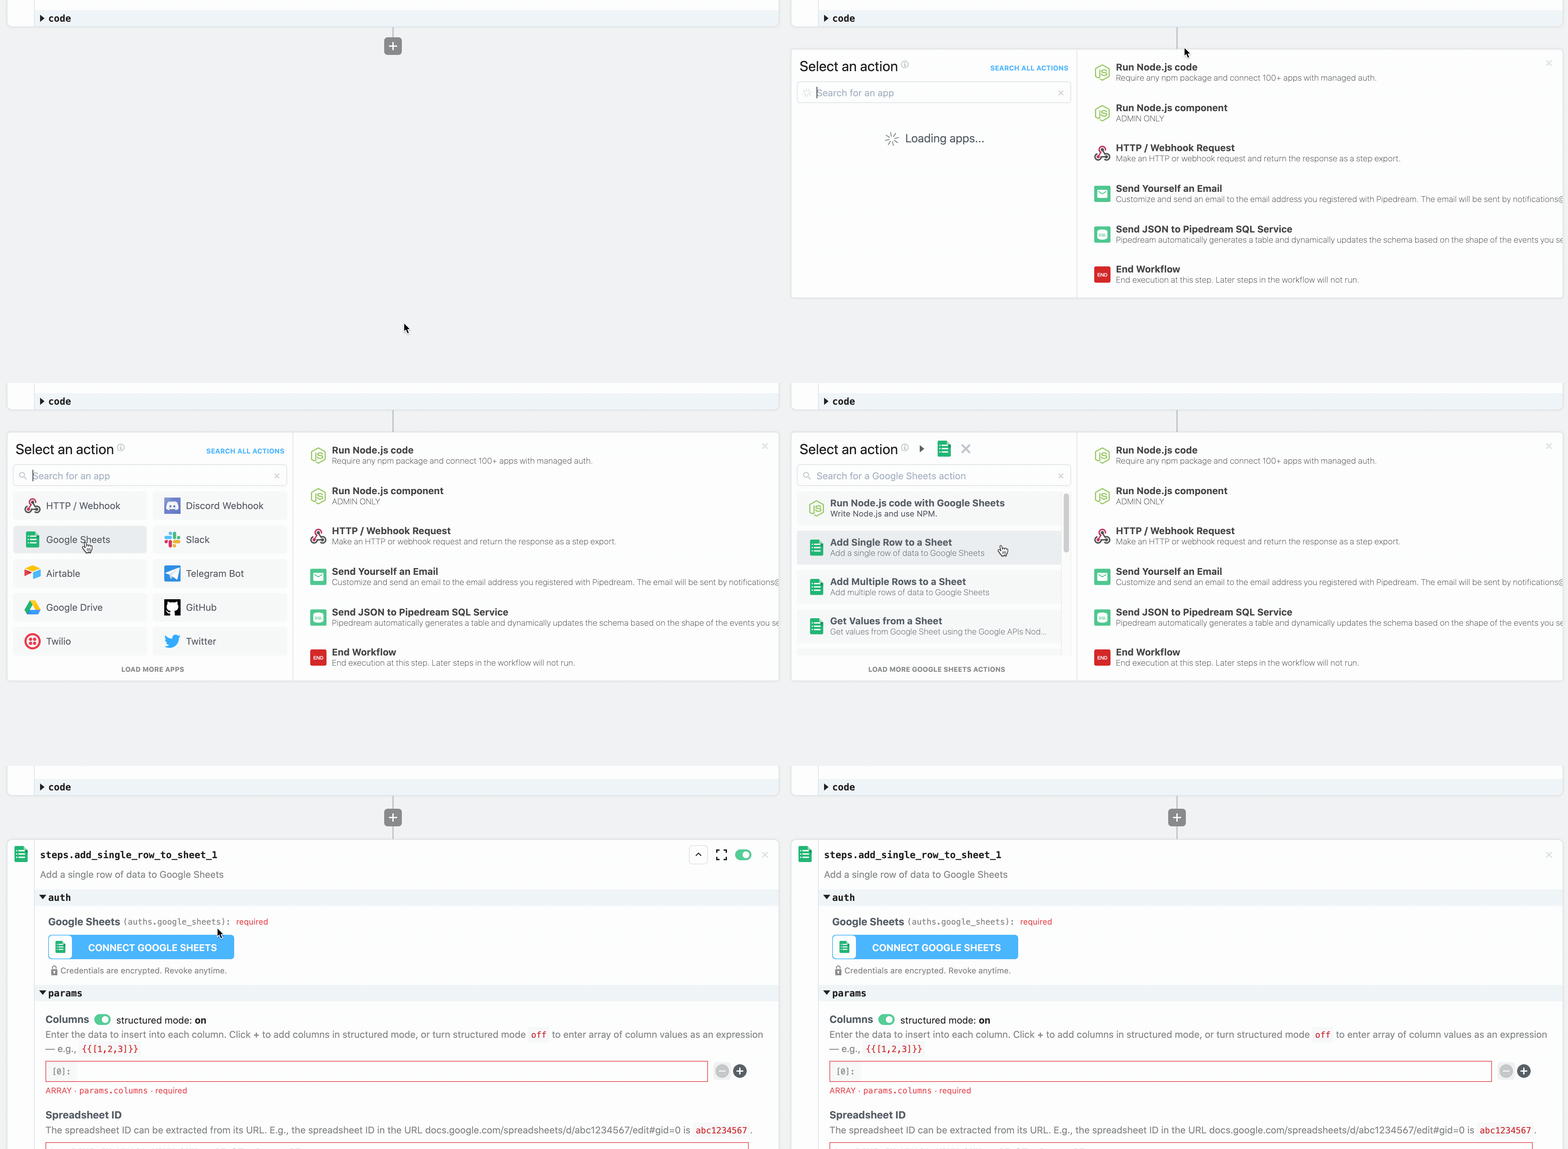
Each row added to the sheet has two columns - the Name and the Title of a Star Wars character. To add a row with the name "Luke" and the title "Jedi", add the Add Single Row to Sheet step to your workflow:
- Click on the + button below any step
- Select the Google Sheets app
- Choose the Add Single Row to Sheet step
See this workflow (opens new window) for a finished example.
To add your own data, you'll need to do four things:
- Click the Connect Google Sheets button and connect your Google Sheets account.
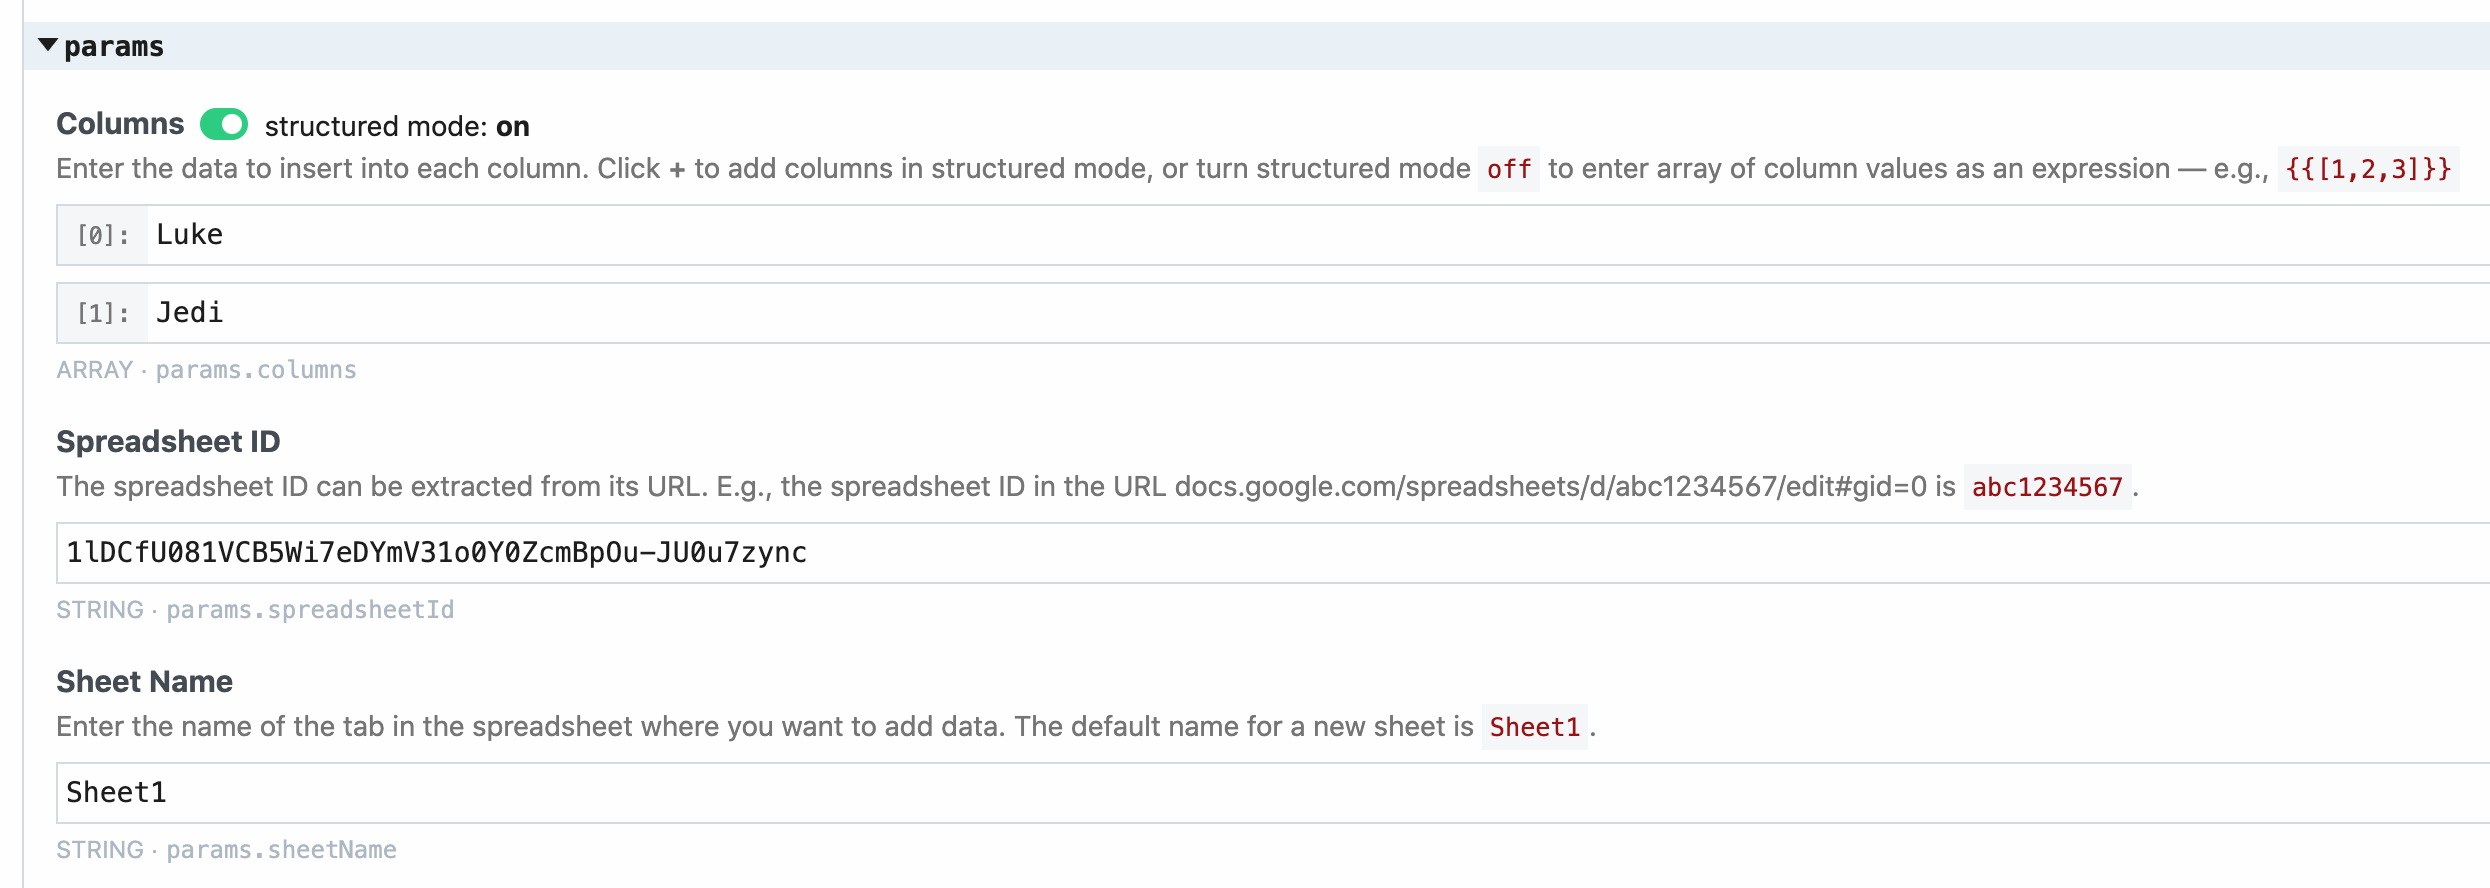
- The Columns section is where you add your data. Each cell of data is placed in its own field in this section. In the example workflow (opens new window), we added "Luke" in the first column. You can click the + button on the right to add another column:

- In the Spreadsheet ID field, enter the ID of your spreadsheet. You can find this in the URL. In the example spreadsheet (opens new window), it's
1lDCfU081VCB5Wi7eDYmV31o0Y0ZcmBpOu-JU0u7zync:

- In the Sheet Name field, enter the name of the specific sheet within your spreadsheet that you'd like to add data to. Sheet names are found at the bottom of your spreadsheet. By default, new spreadsheets have a single sheet named "Sheet 1":
The action should look like this when finished:
and you'll see this data in the spreadsheet:
# Add data from the HTTP payload to your sheet
Read this section for a general overview of how to add a row to a Google sheet.
If you're using the HTTP trigger, you'll find your HTTP payload in the variable event.body. If you send this HTTP POST request:
curl -d '{ "name": "Luke", "title": "Jedi" }' https://endpoint.m.pipedream.net
you'll see this data when inspecting your event:
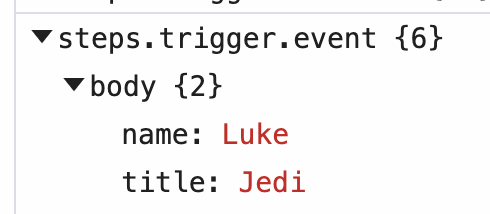
You can access this data in your workflow at the variables event.body.name and event.body.title.
Add the Add Single Row to Sheet action to your workflow. In the Columns section, add references to those variables, along with the Spreadsheet ID and Sheet Name of your spreadsheet:
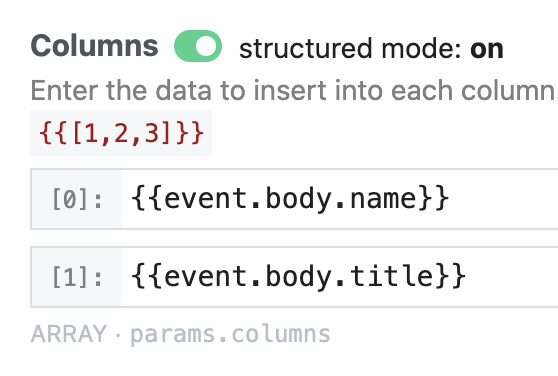
Send the same HTTP request to your workflow, and you should see that data in your Google sheet:
See this workflow (opens new window) for a finished example.
# Add multiple rows to a sheet
Read this section for an overview of the data used in this example.
You can add multiple rows of data to a Google sheet at one time using the Add Multiple Rows to Sheet action:
- Click on the + button below any step
- Select the Google Sheets app
- Choose the Add Multiple Rows to Sheet step

Google Sheets expects these rows to be arrays of data (opens new window). To add two rows of Star Wars characters to your sheet, the row data must look like this:
[
  ["Luke", "Jedi"],
  ["Leia", "General"]
]
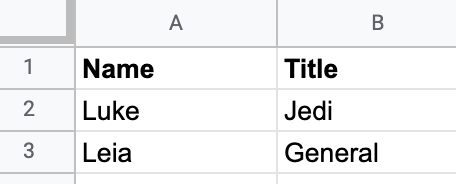
See this workflow (opens new window) for an example of how to add this data to a Google sheet. The final data will look like this:
# Changing complex data to the row format expected by Google Sheets
Read this section for a general overview of how to add a row to a Google sheet.
Often, you can add data to a new row just by referencing the correct variable in your workflow. For example, to store data from the HTTP payload to Google Sheets, you can reference the variables directly as params:

However, your event data might contain a more complex structure that you can't directly reference in params. For example, if your data looks like this:
{
  "data": [
    { "name": "Luke", "title": "Jedi" },
    { "name": "Leia", "title": "General" }
  ]
}
and you want to write the name and title within each object to Google Sheets:

You'll have to write Node.js code to change that data into the format that Google expects (opens new window):
[
  ["Luke", "Jedi"],
  ["Leia", "General"]
]
This workflow shows you how to do that (opens new window):
steps.sample_datareturns sample data.steps.format_datamodifies that data into the format that Google expects:
return steps.sample_data.$return_value.data.map((character) => [
  character.name,
  character.title,
]);
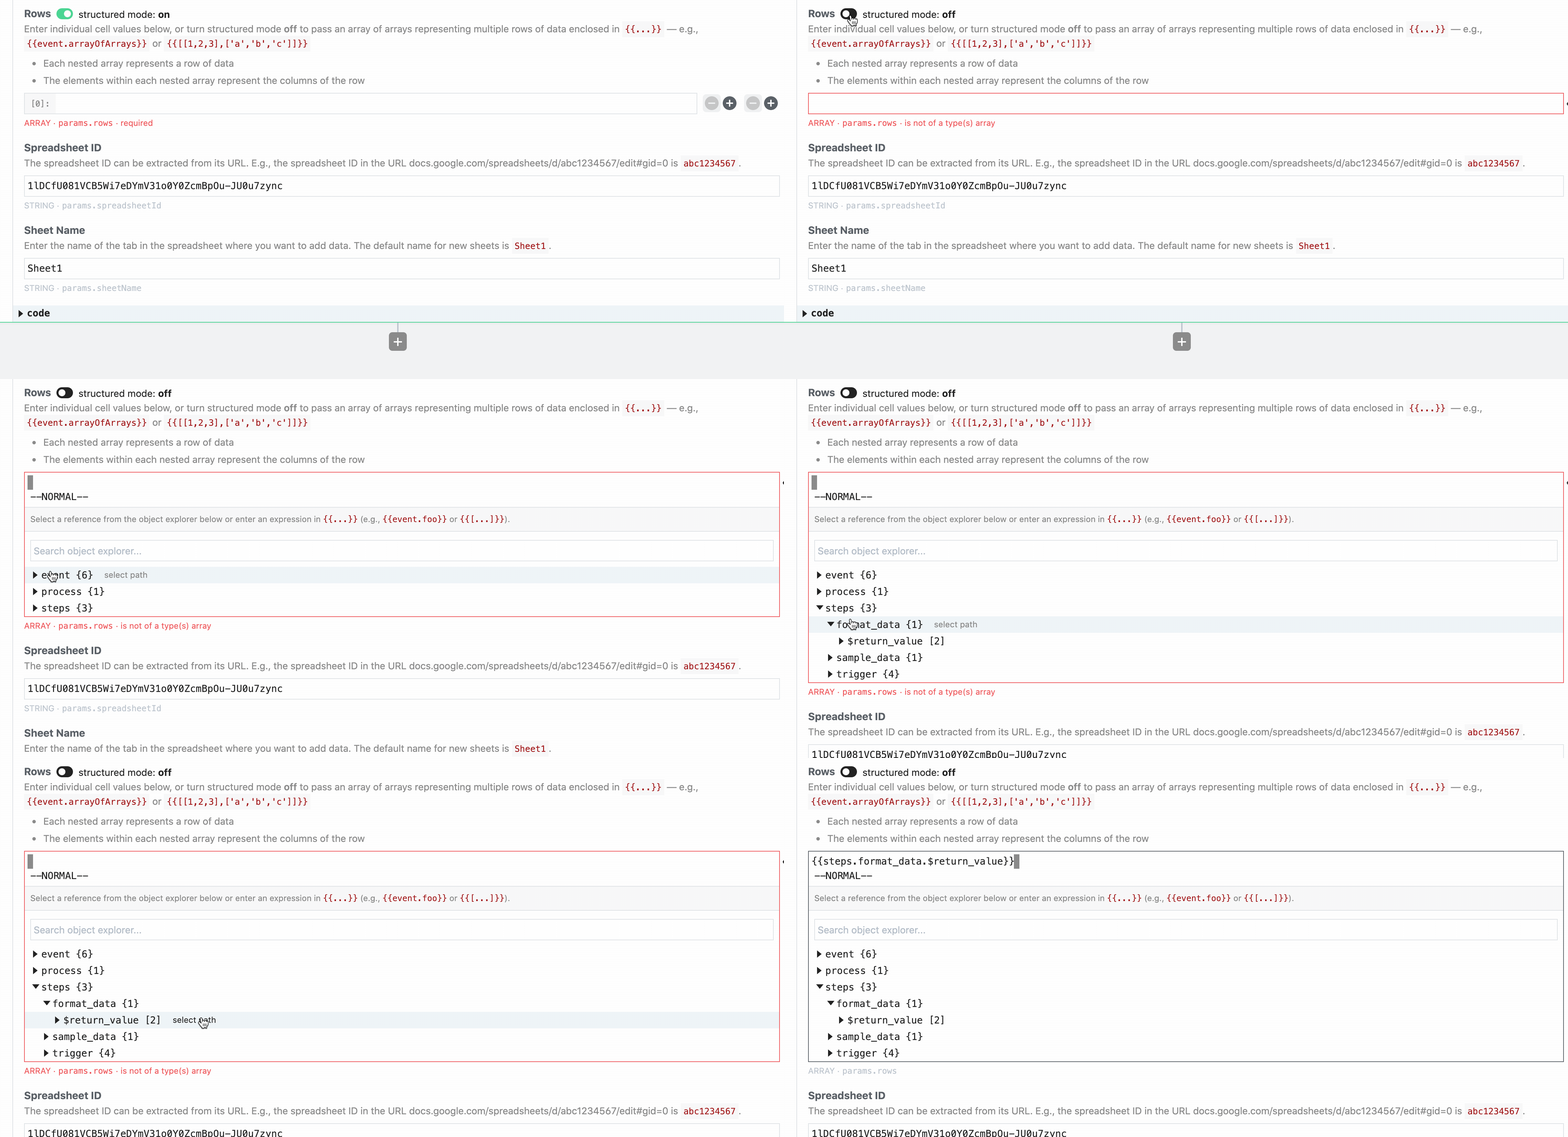
- In the Add Multiple Rows to Sheet step, you can reference the data from the
steps.format_datastep by turning structured modeoffand selecting the data in the object explorer:
